Flying must be one of your passions and you are trying to enjoy every minute of it. Unfortunately, there are administrative tasks you have to do any time you fly. You don’t like filling in your logbook, right? We don’t either.
This is why we’ve had the idea to build an auto-fill function into the application. With this new feature, you can save a lot of time and energy, and now you can concentrate on what is really important for you, flying.
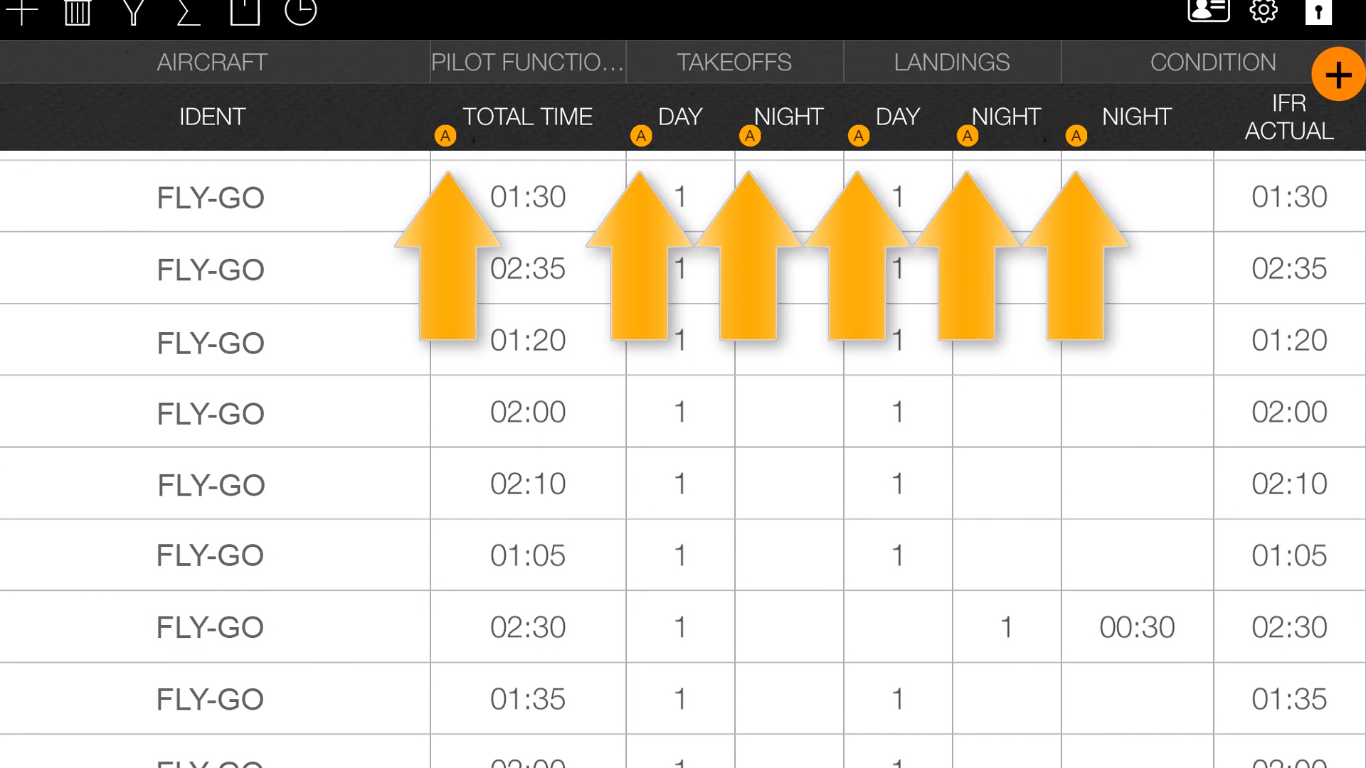
“A” icon refers to auto-fill information
Basically, we can divide the stored information into two categories in the Logbook application. There are certain types of information that you need to enter, such as the place and time of take-off, while others are automatically shown in the application. These are the number of hours flown at night, or the ground time. The application can only fill in this information for you, if you provide some of them in advance.
You can also differentiate between the different types of information. It works in the following way: If you take a closer look at the table, you can see that a lowercase “a” icon indicates those data that the application counts automatically. This way, you don’t have to enter these data.
Personalize your logbook for your needs
Let’s look at an example, how the auto-fill function works in case of the calculation of time. In order to be able to calculate the number of in-flight hours, the exact time of the take-off and landing should be entered into the application. The Logbook calculates the difference between the take-off and landing for you. For some pilots, the flight time at night is also an important information. If you enter the date of the flight, the place and time of the take-off and landing, the application can tell you precisely how many hours you flew during the day and at night. We demonstrated the day and night calculation in our previous blogpost.
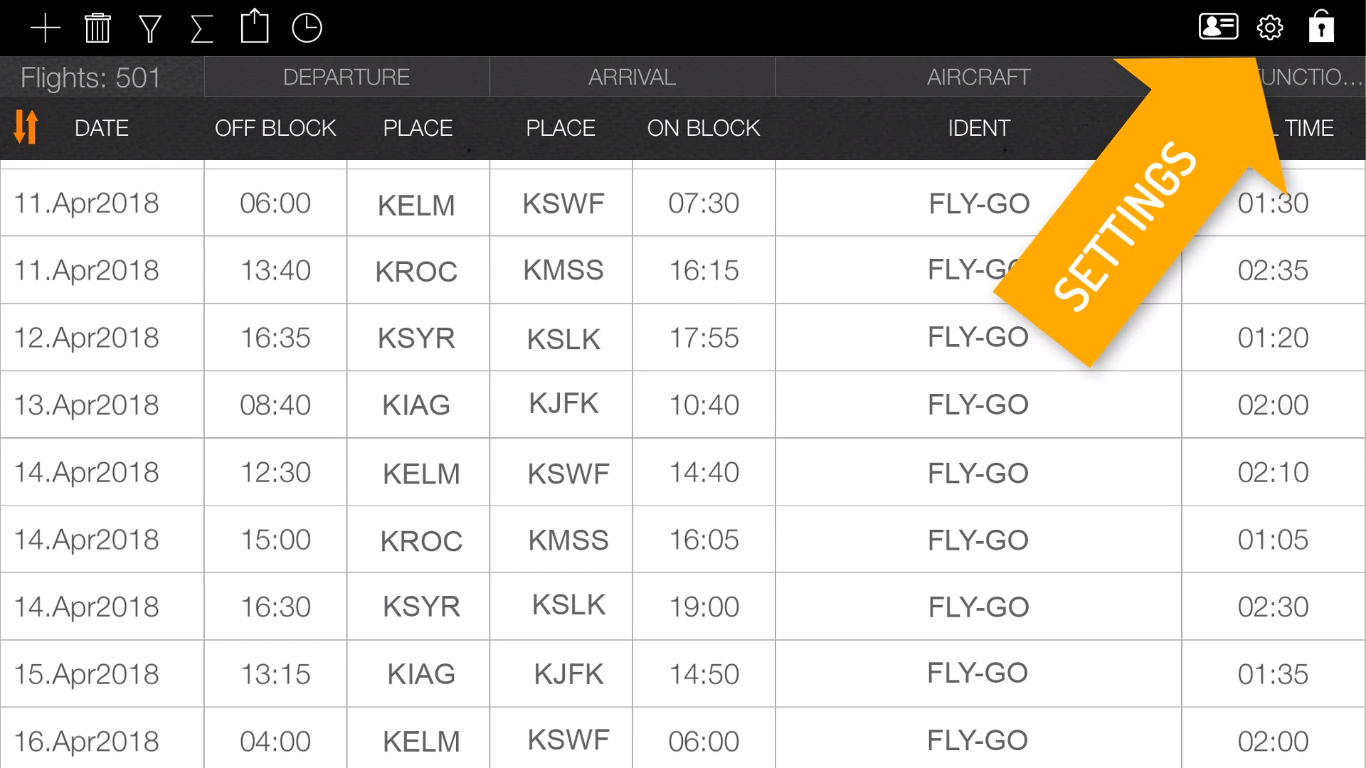
You can find the settings in the menu of the Logbook, which indicates the different opportunities for the auto-fill function. If a certain parameter is supported by auto-fill, you can see the auto-fill settings on the right hand side, marked with orange colour, and you can also see those data. Please keep in mind that the Logbook can only compute certain types of data, if you provided the necessary information in advance (underlined with yellow colour in the example below).
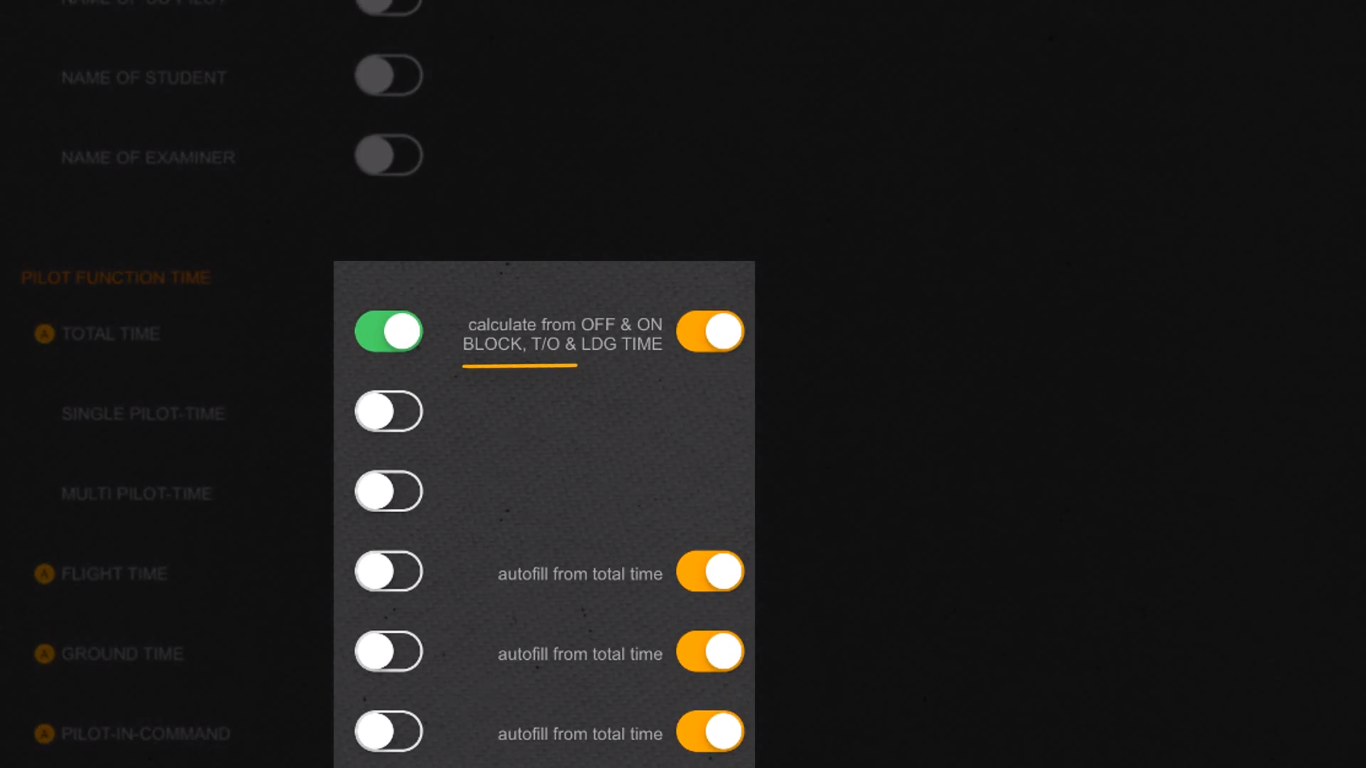
Similarly to the columns in the table, you can also activate or deactivate the information supported by auto-fill function, if you prefer to enter the data yourself.
Don’t show up the data automatically?
These cases stem from two common mistakes. For example, when the user forgets to provide one or more important information, that are needed for the calculation of data. Another case is when the user deactivates the auto-fill function and that’s why the application does not fill in the empty cells.
We hope that this short introduction helped you to understand how the auto-fill function works. We highly recommend you to watch our video to better understand auto-fill function.
Try out this feature and make your flights easier!
Good luck, Pilot!
Did you like the article? Follow us on Facebook and never miss the fresh content!